To launch a branded ecommerce mobile app without code, connect your existing store catalog to a no-code app builder , configure your brand (logo, colors, fonts, splash screen), turn on native features like push notifications and Apple Pay or Google Pay, then submit the finished app to the Apple App Store and Google Play under your own developer accounts.
Most teams go from setup to a store-ready build in days, with store review adding roughly one to several days on top. A branded ecommerce mobile app gives you an icon on the home screen, push notifications, and faster repeat checkout. Those are the main reasons mobile-first shoppers buy more often. You don’t need to hire developers, but you do need your own developer accounts and brand assets ready before you start.
A “no code” launch doesn’t mean “no work.” It means the engineering (the native shell, the API plumbing, the payment SDKs, the push infrastructure) is already built and maintained for you. Your job shifts from writing Swift and Kotlin to making sound product, brand, and merchandising decisions. This guide walks through how a branded ecommerce mobile app actually gets built and shipped this way, what each step involves, and where teams trip up.
What Is a Branded Ecommerce Mobile App?
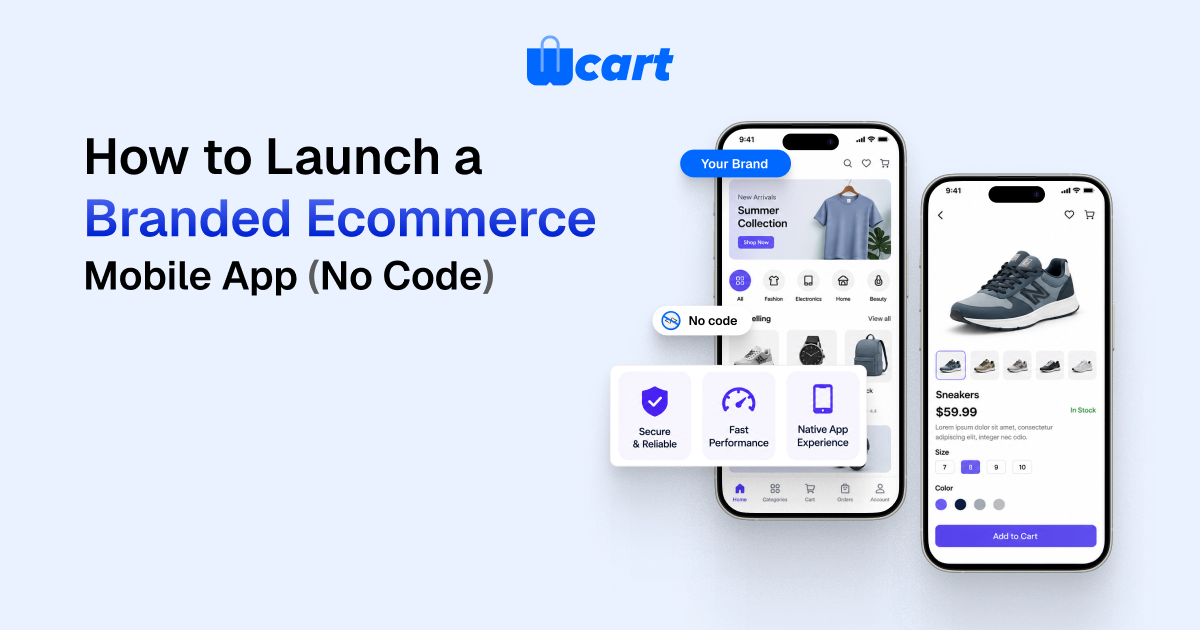
A branded ecommerce mobile app is a dedicated Android and iOS application that allows customers to browse products, make purchases, track orders and receive personalized notifications using a business’s own branding. Unlike whitea mobile website, it provides faster performance, native device features and a more engaging shopping experience.
What “no code” actually gives you (and what it doesn’t)
No-code app platforms fall into two broad camps, and the difference matters for cost, control, and long-term flexibility.
App builders vs. white-label platforms
An app builder wraps your existing storefront, often a hosted platform or a website, into a native or hybrid app through a configuration dashboard. A white-label platform ships you a fully native commerce app that’s purpose-built for selling, with the source code and backend already wired to a commerce engine you control. The table below lays out the practical trade-offs.
| Dimension | App builder (wrapper) | White-label platform |
|---|---|---|
| Setup effort | Lowest, connect store, theme, publish | Low to moderate, configure brand + catalog |
| Native feel | Varies; many are web views | Typically fully native screens |
| Push notifications | Usually included | Included, often with segmentation |
| Ownership | You rent the app; vendor hosts it | Often your own developer accounts + app identity |
| Multi-vendor / marketplace | Rare | Available on marketplace-grade platforms |
| Best for | Single small store, fast test | Brands and marketplaces planning to scale |
Neither approach makes you write code. The deciding question is how much you want to own and how native the experience has to feel. If you’re still weighing whether to ship a true app at all versus a progressive web app, our companion guide on PWA vs native mobile app for ecommerce covers that fork in detail.
No-Code App Builder vs Custom Mobile App Development
| Feature | No-Code Ecommerce App | Custom Mobile App |
| Development Time | Days | 3–9 Months |
| Initial Investment | Low | High |
| Coding Required | No | Yes |
| Maintenance | Platform Managed | Developer Required |
| Native Features | Available | Fully Customizable |
| App Store Publishing | Supported | Supported |
| Scalability | High | Very High |
| Best For | Most Ecommerce Businesses | Large Enterprise Projects |
Before you build: the five things to have ready
The fastest launches are the ones where prep is done first. Gather these before you open any dashboard.
1. Brand assets
You’ll need a square app icon (provide the largest size you have, at least 1024×1024 px), a logo for the header, your hex values for primary and accent colors, and ideally your typography choices. A splash screen image rounds it out. Consistent assets here are what make the app feel like your brand and not a template.
2. A clean product catalog
Your app is only as good as the catalog behind it. Make sure product titles are mobile-friendly (front-load the important words), images are high-resolution and consistently cropped, and inventory and pricing are accurate. A messy catalog looks far worse on a small screen than it does on desktop. Here’s what actually happens when the catalog is sloppy: a title that reads fine in a wide desktop grid gets truncated mid-word on a phone, and a product that looked fine at thumbnail size shows every cropping inconsistency once it fills the screen.
3. Developer accounts
To publish under your own brand you generally need an Apple Developer Program membership (an annual fee) and a Google Play Developer account (a one-time registration fee). Register these early. Apple in particular can take time to verify a business entity. Owning these accounts is what keeps the app yours.
4. Payments and tax configuration
Decide which payment methods to enable. Native wallets, Apple Pay and Google Pay, cut checkout friction sharply on mobile and are worth turning on from day one. Confirm your payment gateway, taxes, and shipping rules are already correct in your store backend; the app inherits them.
5. Legal pages
Both app stores require a privacy policy URL, and you’ll need terms of service. If your app collects any personal data (it does, the moment someone logs in), you have to declare what you collect. Apple and Google both enforce this at review.
Is a Branded Ecommerce Mobile App Right for Your Business?
A branded ecommerce mobile app is the right choice if you:
- Receive a large percentage of traffic from mobile devices.
- Have repeat customers who purchase regularly.
- Want to send personalized push notifications.
- Need a faster checkout experience with Apple Pay or Google Pay.
- Want to strengthen your brand presence on customers’ smartphones.
A mobile website may be enough if you’re launching a new business with limited products or you’re still validating your market before investing in a dedicated app.
Step-by-step: launching your branded app
Step 1, Connect your store
In the platform dashboard, link your commerce backend or import your catalog. With a white-label commerce platform the catalog, customers, and orders are already unified, so the app, web store, and admin share one source of truth. Verify that products, categories, and prices show up correctly in the preview before moving on.
Step 2, Apply your brand
Upload your icon, logo, and splash screen, then set your color palette and fonts. Most builders show a live device preview, so use it. Check the app on both a tall phone and a smaller one, and confirm your logo stays legible on the header background you picked.
Step 3, Configure navigation and merchandising
Decide your bottom tab bar (commonly Home, Categories, Search, Cart, Account), set up your home screen layout (featured collections, banners, best sellers), and configure search and filters. On mobile you have to prioritize ruthlessly: the home screen is prime real estate, so lead with what converts. For deeper conversion tactics, see our hub on mobile commerce optimization.
Step 4, Turn on native features
Enable push notifications (and plan your first welcome and abandoned-cart messages), Apple Pay and Google Pay, biometric or one-tap login, and deep linking so marketing links open the right product inside the app. These native capabilities are the whole reason to ship an app instead of leaning on the mobile web.
Step 5, Test on real devices
Install a test build on a physical iPhone and a physical Android phone. Walk the full path: browse, search, add to cart, apply a coupon, check out with a wallet, get the order confirmation, and tap a push notification. Simulators miss real-world issues with payments, notifications, and performance on older hardware. The one that bites teams most often is a wallet checkout that works flawlessly in the simulator and then fails on a three-year-old Android phone in someone’s pocket.
Step 6, Prepare your store listings
Write a keyword-aware app title and description, capture screenshots at the required sizes for each store, and design a feature graphic for Google Play. Your screenshots are the single biggest driver of install conversion, so show real product screens, not abstract marketing art.
Step 7, Submit for review
Upload the builds to App Store Connect and the Google Play Console, fill out the data-safety and privacy questionnaires honestly, and submit. Apple review commonly takes about a day or two but can run longer; Google is often faster, though new accounts may face extended review. Build in buffer time before any launch date you’ve already promised.
Typical Timeline for Launching a Branded Ecommerce Mobile App
| Phase | Estimated Time |
| Prepare Brand Assets | 1 Day |
| Connect Store | 30–60 Minutes |
| Configure Branding | 1 Day |
| Enable Features & Test | 2–3 Days |
| Prepare Store Listings | 1 Day |
| App Store Review | 1–5 Days |
| Public Launch | Within One Week |
What it costs (honest ranges)
Exact pricing varies widely by vendor and feature set, so treat these as planning categories rather than quotes:
| Cost item | Typical nature |
|---|---|
| Platform / app subscription | Recurring monthly or annual fee; the bulk of ongoing cost |
| Apple Developer Program | Annual fee per Apple’s published rate |
| Google Play Developer | One-time registration fee |
| Brand assets / design | One-time, optional if you have an in-house designer |
| Payment processing | Per-transaction, set by your gateway, unchanged by the app |
The big saving on the no-code route is the absence of custom native development, which would otherwise be the largest line item by a wide margin. Always confirm current developer-account fees directly with Apple and Google, since they change.
Advantages and Limitations of No-Code Ecommerce Apps
Advantages
- Faster launch without development delays.
- Lower upfront investment than custom app development.
- Native features like push notifications and biometric login.
- Easier maintenance with automatic platform updates.
- Faster deployment to both Android and iOS devices.
Limitations
- Some platforms offer limited customization.
- Advanced business logic may require custom integrations.
- App store approvals can delay launches.
- Businesses still need Apple and Google developer accounts.
Common mistakes to avoid
Publishing under the vendor’s account instead of yours
If the app lives under a platform’s developer account, you don’t truly own it and can struggle to move later. Insist on publishing under your own Apple and Google accounts whenever the platform allows it.
Skipping the privacy questionnaire honestly
Both stores audit data-safety declarations. Under-declaring what you collect risks rejection or removal. Apple’s App Store Review Guidelines spell out the privacy and functionality expectations clearly, so read the relevant sections before you submit.
Treating the app like a shrunken website
An app earns its place through native behavior: instant launch, push, saved login, wallet checkout. If you only port the website verbatim, you give shoppers little reason to install. Lean into the native advantages and keep performance fast; Google’s Core Web Vitals thinking on perceived speed applies to in-app experiences too.
Common Myths About No-Code Ecommerce Apps
Myth 1: No-code means limited customization.
Reality: Most modern ecommerce platforms allow businesses to customize branding, navigation, layouts, colors, banners, product displays and promotional content without writing code.
Myth 2: No-code apps cannot scale.
Reality: Enterprise-grade no-code platforms support thousands of products, multiple warehouses, multi-vendor marketplaces and large customer bases.
Expert Tips for a Successful Mobile App Launch
Monitor customer reviews after publishing and release regular updates.
Keep your app interface simple and easy to navigate.
Optimize product images for fast loading.
Enable Apple Pay and Google Pay for quicker checkout.
Send personalized push notifications instead of mass promotions.
Test your app on multiple Android and iPhone devices before launch.
Frequently asked questions
Do I really need to know how to code to launch a branded ecommerce mobile app?
No. With a no-code app builder the native engineering is already done. You configure brand, catalog, and features through a dashboard. The only technical-feeling steps are creating your developer accounts and uploading the final builds, both of which are guided processes.
How long does it take to launch?
The build-and-configure phase is often a matter of days once your brand assets and catalog are ready. The variable is app-store review: Apple commonly takes about one to two days, sometimes longer, and Google is often faster though new accounts may be reviewed more slowly. Plan a buffer of several days end to end.
Can I publish under my own brand and developer accounts?
Yes, and you should. Owning your Apple Developer Program and Google Play Developer accounts means the app, its reviews, and its store identity belong to you. Confirm the platform supports publishing under your accounts before committing.
Will a no-code app feel as good as a custom-built one?
A fully native app can feel indistinguishable from custom for a standard storefront, because the screens, payments, and push are built natively. Pure web-wrapper builders can feel less smooth. If native feel matters, choose a platform that renders native screens rather than embedding a web view.
What about a multi-vendor marketplace app?
Most simple app builders only support a single store. To run a marketplace (multiple sellers, separate vendor payouts, per-vendor catalogs), you need a marketplace-grade platform. Wcart supports multi-vendor commerce, so the same branded app can serve many sellers under one storefront.
How do I keep the app updated after launch?
On a maintained platform, the vendor handles OS-level updates, SDK changes, and security patches, pushing new builds you submit to the stores. Your ongoing work is merchandising, push campaigns, and responding to reviews, not maintaining native code.
Should I build an app or just optimize my mobile website first?
If you have meaningful repeat-purchase behavior and want push notifications and faster checkout, an app pays off. If most traffic is one-time and discovery-driven, optimizing the mobile web (or a PWA) may be the better first step. Our PWA vs native guide helps you decide.
Why Businesses Choose Wcart for Mobile Commerce
Wcart helps businesses launch fully branded ecommerce mobile apps without managing complex development projects. Since the mobile app, website, inventory, payments, shipping and customer management all operate from a single dashboard, merchants can manage every sales channel efficiently. Whether you’re launching a single online store or building a multi-vendor marketplace, Wcart provides the tools needed to scale while maintaining a consistent shopping experience across web and mobile.
Why You Can Trust This Guide
This guide is based on Wcart’s experience building ecommerce platforms and branded mobile applications for businesses across multiple industries. The recommendations reflect practical implementation strategies, industry best practices and real-world ecommerce workflows to help merchants launch reliable mobile shopping experiences.
The bottom line
Launching a branded ecommerce mobile app with no code is genuinely achievable for a non-technical team. The platform absorbs the hard engineering, and your effort goes into brand, catalog, and smart merchandising. Get your assets and developer accounts ready, choose a platform that publishes under your identity and renders native screens, turn on the features that justify an app, test on real devices, and submit with honest store listings. Do that, and you ship something customers actually want on their home screen. When you’re ready to launch branded ecommerce mobile app that powers web and app from one catalog, explore the Wcart platform.


Leave a Reply